POS Hardware Setup for Small Shops: Printer, Scanner, Cash Drawer & PC
Setting up your billing counter? Discover what hardware to buy, what to skip, and how to wire a thermal printer, barcode scanner, cash drawer, and PC without overspending.
Walking into an electronics market like Hafeez Centre in Lahore, Techno City in Karachi, or 6th Road in Rawalpindi can feel overwhelming when you are preparing to digitize your counter. Sales agents frequently push imported, glossy “all-in-one” touchscreen POS terminals carrying price tags north of Rs 120,000 to Rs 180,000 . For an independent grocery store, pharmacy, garment outlet, or mobile accessories shop, that is an unnecessary drain on working capital.
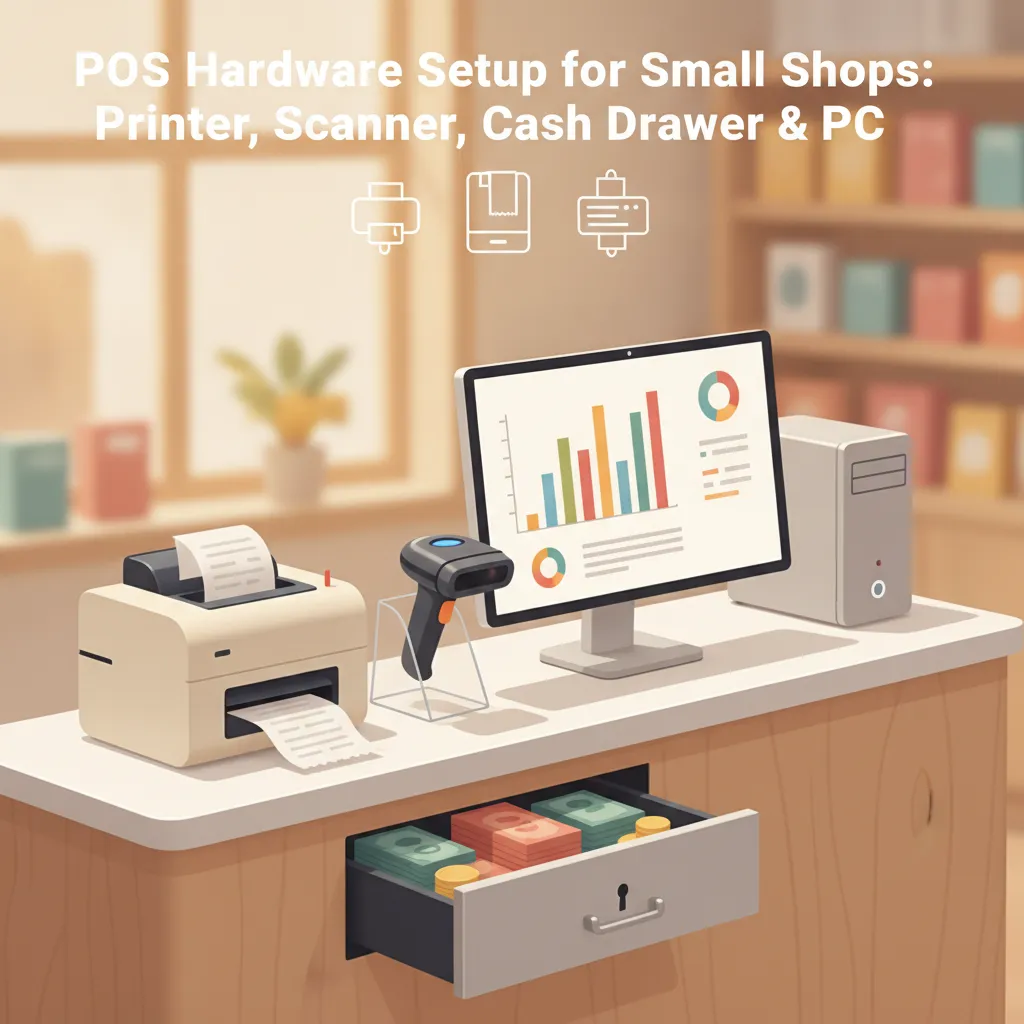
You do not need a luxury touch terminal to run a fast, modern retail checkout. A durable, modular POS hardware setup for small shops: printer, scanner, cash drawer & PC can easily be assembled for between Rs 45,000 and Rs 65,000 using standard, reliable equipment. Even better, modular equipment is easier to repair, cheaper to replace, and keeps running even when individual parts need servicing.
Here is your practical, Pakistan-specific guide on what hardware to buy, what traps to skip, and exactly how to connect your counter peripherals so checkout runs smoothly on day one.
The 4 Core Components: What to Buy
A reliable retail checkout requires four fundamental pieces of hardware. Choosing the right specifications saves money up front and prevents bottlenecks during evening customer rushes.
1. The Computer (PC or Laptop)
You do not need a high-end gaming processor or an expensive dedicated POS machine. Any refurbished desktop tower or business-grade laptop with modest specifications will handle point-of-sale software effortlessly:
- Processor: Intel Core i3 or Core i5 (4th generation or newer is more than adequate).
- Memory (RAM): 8 GB is ideal to ensure smooth multitasking between billing, messaging, and web applications.
- Storage: A 128 GB or 256 GB Solid State Drive (SSD). Avoid mechanical hard drives (HDDs); an SSD boots Windows in seconds and opens inventory screens without lag.
- Form Factor: If your checkout desk is cramped, choose a compact micro-tower or a refurbished business laptop. A laptop also brings a built-in battery, giving you an automatic safeguard against momentary voltage fluctuations.
2. The Receipt Printer (Thermal, Not Inkjet)
Never attempt to print customer slips on standard A4 desktop inkjet or laser printers. Ink cartridges dry out, toner is expensive, and waiting 10 seconds for a page to print irritates customers in line. Standardize on a direct thermal receipt printer .
Thermal printers use heat-sensitive paper rolls, requiring zero ink, ribbon, or toner . You have two common width options:
- 58mm (2-inch width): Costs roughly Rs 6,000 to Rs 9,000 . Best suited for compact kiosks, small chai bars, bakeries, or tuck shops issuing short slips with 3 to 5 items.
- 80mm (3-inch width): Costs roughly Rs 9,000 to Rs 16,000 . The standard choice for supermarkets, pharmacies, hardware shops, and apparel stores. It fits item names, unit prices, discounts, and return policies clearly, and usually includes an automatic cutter.
Ensure the model you choose supports standard ESC/POS emulation and comes with a direct USB port.
3. The Barcode Scanner
Entering product SKUs by typing letters on a keyboard is slow and prone to cashier mistakes. A barcode scanner translates printed lines or 2D codes into keystrokes instantly:
- 1D Laser/CCD Handheld Scanner: Costs around Rs 3,500 to Rs 5,500 . Reads classic linear barcodes found on FMCG goods, packaged medicine, and cosmetics.
- 2D Image CMOS Scanner: Costs around Rs 6,500 to Rs 12,000 . Highly recommended if you sell items with smaller, wrinkled stickers, or need to scan QR codes and barcodes displayed directly on customer smartphone screens.
- Hands-Free / Desktop Presentation Scanner: Costs Rs 9,000 to Rs 15,000 . Sits upright on the desk. Essential for high-volume grocery shops where cashiers swipe items past the window with both hands.
4. Heavy-Duty Cash Drawer
Do not keep cash in open plastic baskets or flimsy wooden drawers. A dedicated metal cash drawer (priced between Rs 7,000 and Rs 14,000 ) protects your earnings and organizes notes by denomination (Rs 5,000, Rs 1,000, Rs 500, Rs 100, Rs 50, Rs 20, Rs 10) alongside coin compartments.
Ensure the cash drawer has an RJ11/RJ12 modular interface cable (resembling an old telephone line jack). This allows it to spring open automatically the second a bill prints.
What to Skip: Save Rs 50,000+ Right Here
When setting up for the first time, shop owners often buy unnecessary accessories promoted by hardware resellers. Skip these extras until your transaction volume truly demands them:
- Integrated Touchscreen All-in-One Terminals: These look modern, but if the touch glass shatters or the motherboard fails during a heatwave, your entire checkout halts. Spare parts can be difficult to source locally. A standard monitor and USB keyboard are far cheaper to repair and faster for skilled cashiers to operate.
- Customer-Facing Pole Displays: Vintage two-line green VFD pole displays cost Rs 6,000 to Rs 10,000 and provide minimal customer value. If you need a customer view later, a simple secondary LCD monitor offers far more utility.
- Proprietary Bluetooth-Only Receipt Printers: Portable Bluetooth printers are great for delivery riders, but unstable for permanent counters. Desktop counters require the rock-solid reliability of a physical USB or wired LAN connection.
- Costly Dedicated Label Printers (for starters): If you do not have unbarcoded stock, you do not need an industrial barcode label printer right away. When you do start tagging loose items or garments, an entry-level thermal label printer can be added without changing your billing setup.
Step-by-Step Connection Guide: Wiring Your Counter
Connecting your POS peripherals takes less than twenty minutes once you understand the basic signal routing. Follow this sequence:
- Power and Surge Protection: Plug your PC and printer power bricks into an Uninterruptible Power Supply (UPS) or a surge-protected extension board. Clean, regulated power prevents fried adapter boards during neighborhood transformer cuts.
- Connect the Barcode Scanner: Plug the scanner’s USB cable directly into any available USB port on your PC. Standard POS scanners operate as standard “Human Interface Devices” (HID). You do not need third-party driver disks; Windows recognizes the scanner as a secondary keyboard. Test it by opening a blank Notepad window and scanning any item from your shelf. The barcode numbers should appear on the screen followed by an instant “Enter” line drop.
- Install the Thermal Receipt Printer:
- Connect the printer’s round power lead to its DC power brick, then connect the USB cable to your computer.
- Turn the printer power switch ON.
- Insert the thermal paper roll so that the paper feeds from the bottom of the roll toward the cutter (thermal paper only prints on one side; if receipts come out blank, flip the roll around).
- Install the manufacturer’s driver on your operating system (most use common Pos58 or Pos80 Windows printer drivers). Print a Windows test page to confirm clear alignment.
- Connect the Cash Drawer (The Common Mistake):
Important: Never try to plug your cash drawer directly into your computer. PCs do not feature the 24V impulse ports needed to trigger drawer solenoids.
Take the RJ11 cable coming from the bottom of your cash drawer and plug it into the DK (Drawer Kick) port on the back of your thermal receipt printer. When the computer sends a print command to the receipt printer, the printer sends a momentary electrical pulse through the RJ11 cable to release the latch, popping your drawer open automatically.
- Enable the Cash Drawer Trigger in Windows:
In Windows, open Printers & Scanners → click your thermal printer → choose Printing Preferences → find the Device Settings tab. Set the “Cash Drawer” option to Open Before Printing or Open After Printing. Hit Apply.
Counter Reliability: 3 Rules for Pakistani Shops
A billing counter in Pakistan faces three unique challenges: frequent power interruptions, heavy airborne dust, and accidental liquid spills.
- Secure Your Load Shedding Backup: If your shop experiences regular power outages, ensure your desktop PC, printer, and Wi-Fi router run through a dedicated solar setup, generator line, or pure-sine-wave UPS. A 1000VA UPS keeps your billing terminal running for 30 to 45 minutes of active printing.
- Elevate Hardware Off Floor Level: Never place your desktop tower directly on the shop floor where daily sweeping sweeps dust and debris into cooling fans. Elevate the tower on a wooden riser or attach it under the counter.
- Organize and Anchor Your Cables: Pulling on a loose drawer cable during a rush can snap the RJ11 connector. Use simple zip-ties or cable clips under the counter to keep power cords, scanner lines, and drawer triggers pinned securely away from cashiers' knees.
How CPOS Helps
Once your physical counter hardware is assembled, you need software that communicates with your peripherals without requiring complex technical configurations. CPOS is lightweight point-of-sale software designed specifically for retail environments across Pakistan.
- Plug-and-Play Barcode Billing: CPOS supports standard USB barcode scanners right out of the box. Scan items directly into invoices with instant price calculation and automatic stock deductions.
- Fast Thermal Receipt Printing: Generates crisp invoices formatted for supported 58mm and 80mm thermal receipt printers, keeping counter queues moving.
- Built-In Offline Mode: When internet connectivity drops or fiber lines are disrupted, CPOS allows you to continue billing customers without pause. Data is saved locally and automatically syncs to the secure cloud once your connection restores.
- Mobile Flexibility: Need to check shelves or scan stock away from the counter? The CPOS mobile app lets you manage real-time inventory and monitor sales directly from your smartphone.
- Setup in Minutes: Guided quick setup allows you to add products, set low-stock alerts, and start ringing up transactions without paying technician installation fees.
Small shopkeepers can begin on the CPOS Starter Plan, which is completely free and supports up to 100 sales per day and up to 1,000 product SKUs on 1 desktop and 1 web user.
Build Your Counter with Confidence
Running an organized, leak-free counter does not require spending lakhs on proprietary hardware. By choosing an affordable refurbished PC, a durable ESC/POS thermal printer, a responsive 2D scanner, and an RJ11-triggered cash drawer, you get an industrial-grade billing counter that stands up to heavy daily trading without breaking your startup budget.
Ready to power up your new counter hardware with modern billing and inventory tools? Start with CPOS free today and start printing fast, professional customer receipts in minutes.